How to Look After Your Mouthpiece
Mouthpiece cleaning is important of course, but first let’s look at how to maintain it on a regular basis in order to help prevent it from getting into such a sad state that makes refurbishment necessary. We are then going to look at how to refurbish and clean an aged or abused mouthpiece.
In the old days of local music stores which always stocked the popular mouthpieces, saxophone players were usually able to try them out, find a good one and usually stick with it. These days there are fewer of these shops and many more mouthpieces to choose from, so very often the best way to try mouthpieces is to buy them online and return them or sell them on if they aren’t ideal. So it’s more and more important to make sure that when you do sell them on, they are in a presentable condition. This article will help you maintain the mouthpiece either for your own use or for its resale value.
1. Prevention is better than cure
If you take a few simple steps, the refurbishment procedure in the second part of the article should be more or less unnecessary.
Swab and Dry
Many players just put the cap on after playing and put the mouthpiece away in the compartment in their case. When this happens then any moisture, plus microbes from your mouth, will most likely remain damp and after a while build up into the nasty beige colored smelly gunk you sometimes see (biofilm). If a mouthpiece is put away for a long period of time in this state, then that gunk often hardens to form a solid layer inside the mouthpiece. So the first thing to make sure you do is to clean and dry the mouthpiece after use. There are dedicated mouthpiece swabs for this, or you can just use a piece of tissue or kitchen towel.
If you have collected some gunk in your mouthpiece and it is still soft and slimy (yuk), then you can remove it with a small toothbrush under a tap.
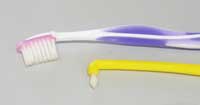
Always use Protection
To prevent bite marks and scratches on the beak, you can use a mouthpiece patch. You can get these in different thicknesses. There are thicker spongy ones which are useful for people who don’t like the direct contact of their teeth on the hard mouthpiece surface, or thinner ones for those who prefer it to feel more like there is no patch. You can also use electrical tape cut to size, which doesn’t last as long but does the job.
I also use electrical tape underneath the ligature to prevent any scratches on the body of the mouthpiece.
2. Refurbishing
Inside
To remove dried on gunk, first try to soften it by soaking the whole mouthpiece in water and a mild detergent. Do not use warm or hot water for hard rubber (ebonite) mouthpieces. This will cause discoloration. It is OK for metal or resin. If the gunk has softened you can then use a toothbrush as above.
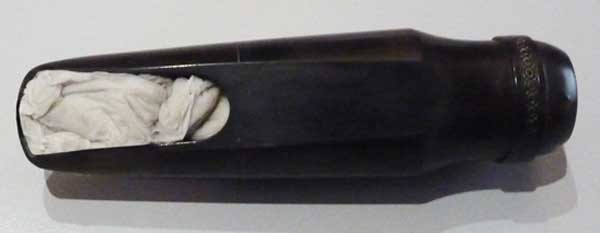
If the gunk is still hard you need to soften it with vinegar. Do not immerse the mouthpiece in vinegar, as it can cause affect the finish. Instead place a rolled up piece of cotton wool or kitchen towel inside the mouthpiece and add a few drops of vinegar to that. Wipe any surplus off the outside. You can leave this in place for a couple of hours or if necessary overnight, after which the gunk should have softened and can now be removed with the toothbrush. There is no need to worry that the vinegar may have made the inside less shiny, many people think that a slightly rough surface inside is a good thing, however if you do want to polish the inside then it can be done using a Dremel with a small buffing wheel tool.
Outside
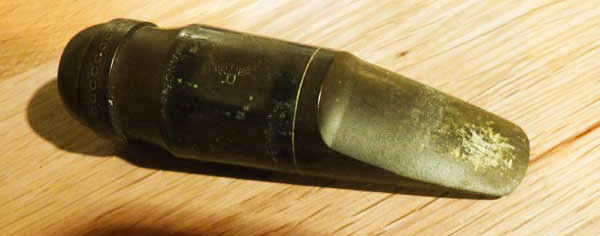
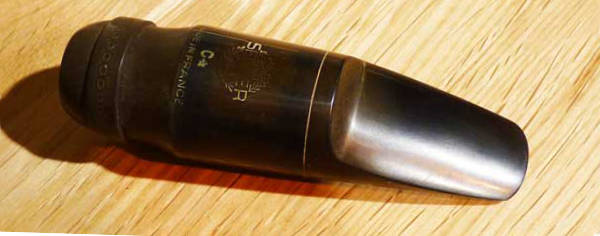
Most scratches and light bite marks can be removed from hard rubber and resin mouthpieces using the method below. Deep bite marks need filling and are probably best left to a technician. Scratches on metal mouthpieces are more problematical as any kind of abrasive treatment may remove the plating.
A very good tool is this type of four sided fingernail sanding block which you can get from cosmetic and beauty shops:

- Step 1: Even Out. I use this first using a circular motion which helps remove the deepest scratches without leaving ridges. Once the scratches are gone, I like to finish with few linear strokes. The surface will look rough with a very fine grain.
- Step 2: Smooth. This should remove any of the very fine scratching left by the file.
- Step 3:Buff. It will start to look polished and lovely
- Step 4 : The final polish.
Before and after:
If scratches are too deep for this method then you can start off using sandpaper in gradually decreasing coarseness. I find that 240 or 300 grit will quickly remove quite deep scratches. After using this, it will look very rough so you need to then gradually make smoother with 600 followed by 1200. At that stage you can use the nail block.
The Icing on the Cake
For hard rubber mouthpieces, the above process may help remove some of the green or brown discoloration that can happen, but it will often help to rub with some olive oil on a soft cloth. To prevent further discoloration, try to avoid leaving the mouthpiece in sunlight.
More mouthpiece cleaning and polishing info on Cafesaxophone:
How to clean polish a mouthpiece